Setting Up the Registration and Add/Drop Courses Features
J1 Desktop Setup
At the time students attempt to register online, Advisors can interact
with their Advisees via Advisor Approval or Advisor Clearance. Based on
each Web Registration Group, you can indicate if that group of students
is required to have Advisor Clearance or Advisor Approval.
Set Up Registration and Course Requirements
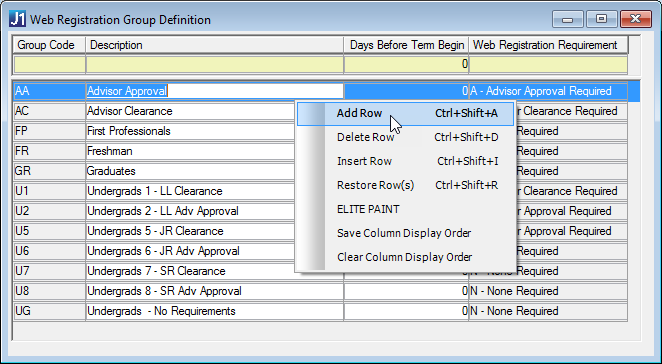
Define Web
Registration Groups
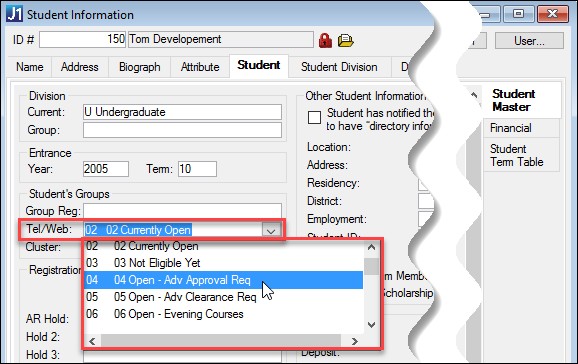
Assign Students
to Web Registration Groups
Assign Advisor
Approval and Registration Clearance for Web Registration Groups
Set Up Courses
for Online Availability
Manage Courses
in Registration Configuration
Determine Group
Overrides for Web Registration Restrictions
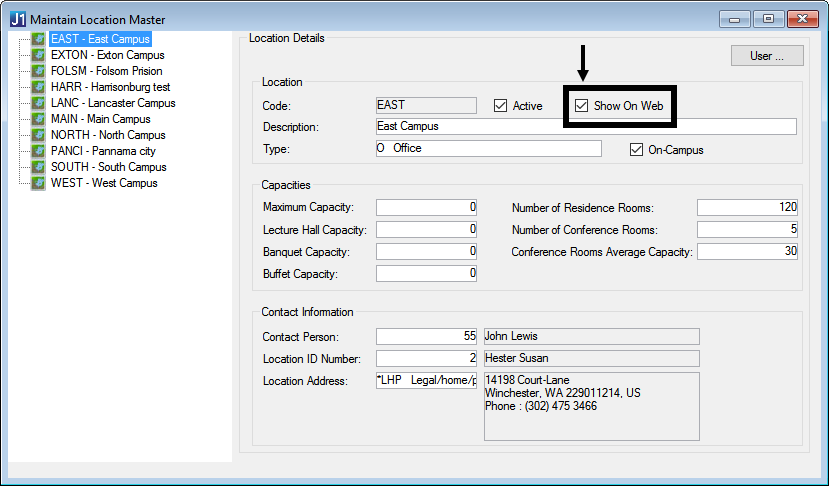
Show Campus
Locations on Course Search
Show Holds
in the Add/Drop Courses Feature
JICS Setup
Configuration settings in JICS can be done by roles with permission
to access and administer global and portlet settings.
 |
If you are an administrator and need help setting up
and configuring this feature, see the detailed setup sections
below. |